Vector in CPP programming language is different from the Vector concept in Physics or Biology. Vector is a special component that helps to store data in itself. It can only able to store similar kinds of data to it. This means all the integers or the value of the character can be stored in one single vector.

It seems like the Array. But this is different from the array in some mean. It only differs from the size perspective. The size of the array can’t be changed. Once it is declared, it will be fixed. However, the size of the vector can be changed. Sometimes a large number of data can be stored there.
In the C programming language, we used dynamic programming to store such types of data. We called them Dynamic Memory Allocation. Here, instead of that, we are using vectors for the same purpose. However, improper memory management can lead to memory leaks in C++, which is crucial to avoid while working with vectors.
If you’re curious to know more about memory management techniques, explore our guide on Dynamic Memory Allocation in C, which lays the foundation for understanding C++ vectors.”
Now, after getting a simple definition of the C++ Vector, it is time to know its basic declaration process. It is the simple process by which we can use the C++ Vector in any program. But, before going for the declaration, we have to insert one main statement in the code.

For declaring a Vector in C++, we have to first include one header file. This header file will help to use the Vector & other methods associated with the Vector in C++. This is the library header file. After adding the header file we need to declare the vector.
The Header File: #include <vector>
For declaring the vector, we need to follow one specific syntax. First, we need to write a vector. Then inside the <> symbol, we need to write the nature of the data. This means we are going to add the integer value of the character value to the vector. Then we have to provide the name of it.
“Vectors are the stepping stone to advanced containers; if you want to build a strong foundation in STL, booking a DSA tutoring session is highly recommended.”
General Syntax: vector<data-type> name;
Simple Declaration of Vector in C++ Programming Language:
There are a lot of methods present to initialize vector Cpp. Some of them can be assumed as the repetition of another method. But they are completely different from each other. Depending upon the use & importance, we can able to make a list of six methods. These methods can be used to initialize Vector Cpp.

- By Using Push_Back() Method
- By Using Size Of Vector
- By Using Array
- By Copying From Another Vector
- By Using The Index Of Vector
- By Using Fill() Method
Let us know about each & every method one by one briefly. But before that, we need to know the basic declaration of the Vector.
How To Initialize Vector Cpp By Using Push_Back() Method?
Push Back Method is the process by which we can insert any data to any blank C++ Vector. It is like the Insert operation we perform on any Lined List or Queue Data Structure. Here, the value will be shared as the Argument of Push back Method.
General Syntax: vectorname. push_back(value)
Program To Define The Push Back Method For Vector Using C++ Programming Language:
Output:

From the above output, we can see that the two values Data 1 & Data 2 were successfully inserted in the program. And as the insertion operation was successful, the printing operation also succeeded.
How To Initialize Vector Cpp By Using Size Of Vector?
Here, we need to use the default size method of the Vector. We have to provide the size along with the value. This will help to add value that much times to it. In this way, we can able to add some data to Vector easily.
As the first argument, the size of the Vector should be provided. As the second argument, we have to provide the value that will be stored in the vector.
General Syntax: vector<data-type> vectorname(size, value);
Program To Define The Size Method For Vector Using C++ Programming Language:
Let us try to find out the output of the above code. This will help to know the process to initialize Vector C++.
Output:

From the above output, we can see that the declaration of the Vector has done completely well. The value 2 is inserted in the program five times, as the vector is declared with the size 5. Hence, the declaration of the Size() method has done errorless.
How To Initialize Vector Cpp By Using Array?
Here, the vector will be declared, but in a different format. The Array format will be used for initializing the Vector in C++. Hence, we can provide a series of data to the Vector without taking the help of the Push Back Method.
After declaring the data type, inside the braces, we have to provide the values that are separated with the comma. The Following Syntax can be used to refer to the declaration process.
General Syntax: vector<data-type> vectorname{value1, value2….};
Program To Define The Vector Using The Array Format In The CPP Language:
Let us try to find out the output of the above code. This will help to know the process to initialize Vector C++.
Output:

From the above output, we can see that the printing process is completed successfully and the values can be seen in the output. So, the array that was declared for taking the values for the vector executed well.
How To Initialize Vector Cpp By Copying From Another Vector?
In this process, we will not declare any vector from scratch. Rather, we will copy one vector from another vector which is already declared & there are some values present. Luckily, the C++ Vector comes with an easy process to copy any other vector.
In that case, the vector where the data will get copied will be present outside of the braces. The Vector that is used for copying will be present between the braces. Do check the following syntax for getting more clarification.
General Syntax: vector<data-type> vectorname2(vectorname1);
Program To Implement The Process To Copy One Vector To Other In CPP:
Let us try to find out the output of the above code. This will help to know the process to initialize Vector C++.
Output:

Though, we have not inserted any values in the Vector. So, the Copying Operation from the Zap Vector has worked correctly.
How To Initialize Vector Cpp By Using Index Of Vector?
As there is a similarity between the Vector and Array, both have the same index values. This means, the Vector Data Structure also has Index values of the element & that is started from the Zero Value. We can use those Index Values to enter data into the Vector.
Just like the Arrays in the programming language, we have to use the Vector Indexes in the same format. You can go through the following program to clear the concept.
Program To Define The Index Values For Initializing Any Vector In CPP:
Let us try to find out the output of the above code. This will help to know the process to initialize Vector C++.
Output:

From the above output, we can see that the values are getting printed in the program successfully. So, the insertion of values in the program was successful with the help of the index values. So, the program was declared correctly.
How To Initialize Vector Cpp By Using the Fill() Method?
The Fill() Method is another important method that works similarly to the Size() Method discussed earlier. In this case, also, a value gets stored repetitively in the vector until the end of the vector arrives. There are three arguments present in the Fill() Method.
The first one is the Begin() function, the second one is the End() Function & the third one is the value. We have to provide the Vector Name along with the Begin() & End() functions. We can follow the below syntax for more clarity.
General Syntax: fill(vectorname.begin(),vectorname.end(),value);
Program To Demonstrate The Use Of Fill() Method To Declare Vectors In CPP:
Let us try to find out the output of the above code. This will help to know the process to initialize Vector C++.
Output:

From the above output, we can see that the value 3 is inserted in the program for 3 times. As the size of the vector is 3, the value will be inserted in the program 3 times. So, we have successfully used the Fill Method in the program. Understanding these methods is crucial for working with vectors in C++.
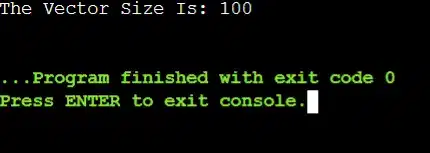
The program creates a vector named numbers. The value 100 tells C++ how many elements the vector should contain. The value 0 tells C++ to fill all 100 positions with zero.
No loop is needed because the vector constructor automatically initializes all elements. Finally, the size of the vector is printed to confirm that it contains 100 elements.
Output:
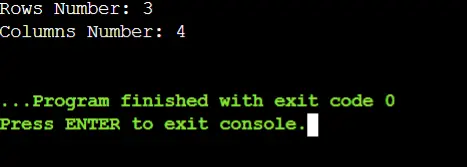
The program creates a 2D vector named matrix. The outer vector represents the number of rows (3 rows). The inner vector represents the number of columns (4 columns).
Each element inside the 2D vector is initialized with the value 0. The program prints the total number of rows and columns to confirm correct initialization.
Output: